Effects
- Edge Effects - Enhance
Layers
- Merge - Merge Visible
ffects - Plugins -
<I.C.NET
Software>
Filters Unlimited
2.0 -
It@lian Editors
Effect - Vetro
03
Maximize Tube
"chiaka-grunge" from
tray
Edit - Copy
On your work image: Edit - Paste
As New Layer
Image - Resize - 90% - Resize
all Layers not checked
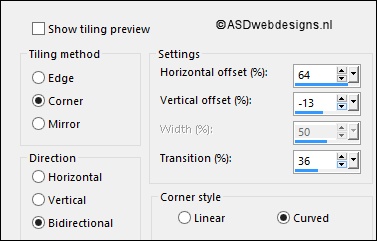
Effects
- Image Effects - Seamless Tiling
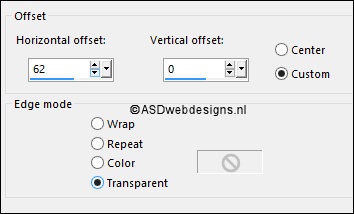
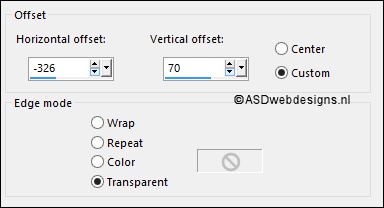
Effects
- Image Effects - Offset
Effects - Plugins -
<I.C.NET
Software>
Filters
Unlimited 2.0 -
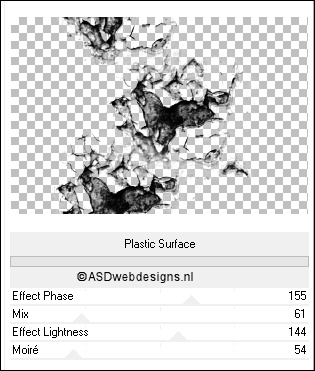
Special Effects 1 -
Plastic Surface
Layer Palette -
Double click on this Layer and set the Blend Mode to
"Soft Light"
04
Color Palette: Change the
Backgroudcolor to #ffffff 
Layers - New
Raster Layer
Selections - Load/Save Selection -
Load Selection From Alpha Channel -
Selection #1
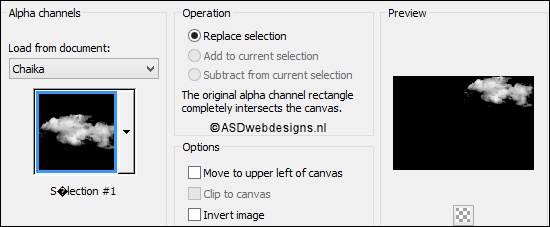
Fill with the
Backgroundcolor
(Right Mouse Click)
Selections - Select None
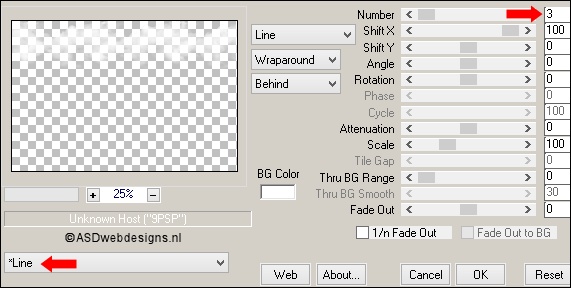
Effects - Plugins -
MuRa's Meister -
Copies
Effects
- Image Effects - Seamless Tiling
Effects - User Defined Filter -
Emboss_3 
05
Layers - New
Raster Layer
Fill with the
Backgroundcolor
(Right Mouse Click)
Layers - New Mask
Layer - From Image -
Jillsmasque-spring
- Source
luminance Checked -
Invert mask data NOT
checked
Layers - Merge - Merge Group
Effects - User Defined Filter -
Emboss_3
06
Maximize Tube
"element
chiaka" from
tray
Edit - Copy
On your work image: Edit - Paste
As New Layer
Layer Palette -
Double click on this Layer and set the Blend Mode to
"Overlay"
07
Layers - New
Raster Layer
Selections - Load/Save Selection -
Load Selection From Alpha Channel -
Selection #3
Fill the Selection with the
Backgroundcolor
Selections - Modify - Contract - 2 px
Edit - Cut (Or hit the Delete Key of
your Keyboard) 
Keep selected
08
Layers - New
Raster Layer
Set the Opacity of
the Flood Fill Tool
to 25
Fill the Selection
with the
Backgroundcolor
Color Palette:
Change the
Backgroundcolor to
#abb69f 
Effects -
Plugins - Dynasty
Software - Under The
Rose
Selections - Select
None
09
Magic Wand Tool
 - Mode: Add /Shift
-
Tolerance 50 - Contiguous checked -
Anti Alias Checked -
Click in this part
of the image:
- Mode: Add /Shift
-
Tolerance 50 - Contiguous checked -
Anti Alias Checked -
Click in this part
of the image:
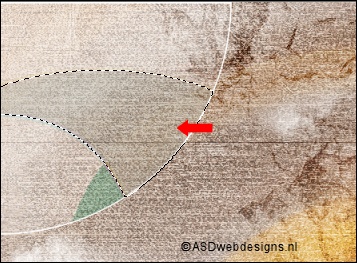
Fill the Selection
iwth the Backgroundcolor
Click two times
Floodfill Tool: Set
the Opacity back to
100
Selections - Select
None
10
Layers - Duplicate
Layer Palette - Click on the Second Layer from the Top
Effects - Image Effects - Seamless Tiling
11
Layer Palette - Click on the Top
Layer
Effects - Plugins - Alien Skin Eye Candy
5 - Impact -
Perspective Shadow
- Settings
Tab:
Preset
"chiaka-nicole"
Layers - Merge - Merge Down
Effects - Plugins - Alien Skin Eye Candy
5 - Impact -
Backlight
- Settings
Tab:
Preset
"Chiaka-nicole-backlight"
Effects - Image Effects - Seamless Tiling

12
Layers
- Duplicate
Layers - Merge -
Merge Down
Layers - Duplicate
Image
- Mirror - Mirror Horizontal ( Image - Mirror in previous PSP
Versions)
Image - Mirror -
Mirror Vertical (
Image - Flip in
previous PSP
Versions)
13
Color Palette: Change the
Backgroudcolor to #ffffff
Layers - New
Raster Layer
Fill with the Backgroundcolor
Layers - New Mask
Layer - From Image -
MASK-MD-111 - Source
luminance Checked -
Invert mask data NOT
checked
Layers - Merge - Merge Group
Adjust
- Sharpness - Sharpen More
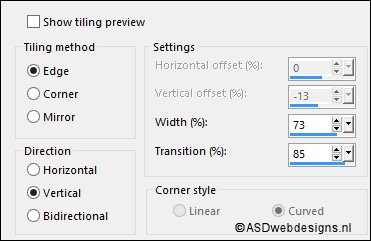
Effects - Reflection Effects -
Rotating Mirror
14
Color Palette:
Change the
Backgroudcolor
to
#abb69f
Layers -
New Raster Layer
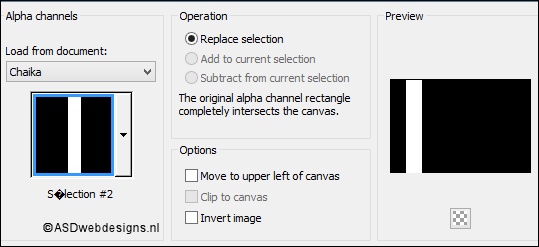
Selections - Load/Save Selection -
Load Selection From Alpha Channel -
Selection #2
Fill the Selection with the
Backgroundcolor
Selections - Select None
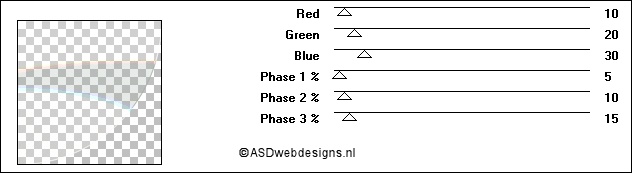
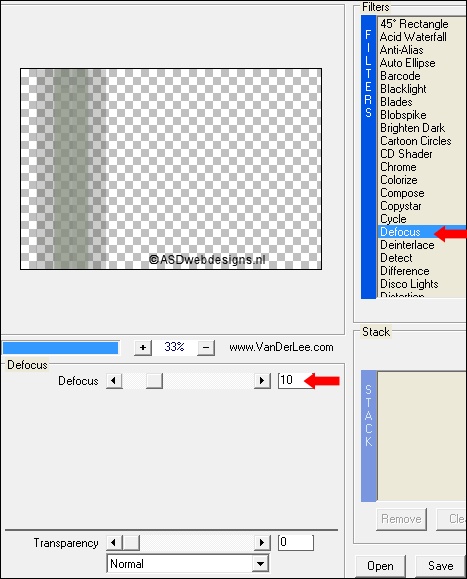
Effects - Plugins - VanDerLee -
Unplugged X -
Defocus
Effects - Edge Effects - Enhance
Layer Palette -
Double click on this Layer and set the Blend Mode to
"Hard Light" and the Layer Opacity to 55
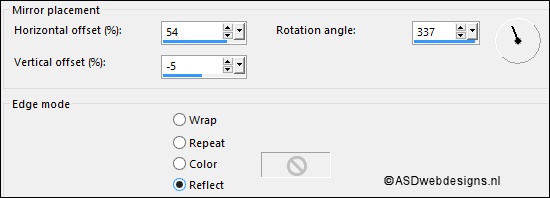
Effects - Plugins
- Flaming Pear - Flood - Click on the Red
Arrow
 and load Preset
nicole-chiaka.q8r
and load Preset
nicole-chiaka.q8r
15
Maximize Tube
"Titre" from
tray
Edit - Copy
On your work image: Edit - Paste
As New Layer
Effects - Image
Effets - Offset
16
Layer Palette - Click on the Bottom
Layer
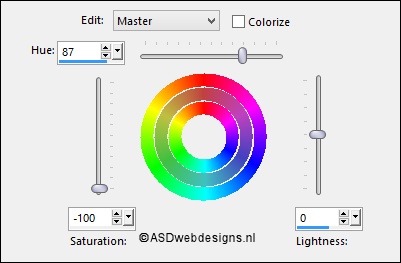
Adjust - Hue and Saturation -
Hue/Saturation/Lightness
(If you are using different colors
play with the settings to match your
tube)
17
Color Palette:
Change the
Backgroudcolor
to #665650

Your Foreground
color is still
set to Gradient
Image - Add Borders - Symmetric
checked - 30 px - #ffffff
Image - Add Borders - Symmetric
checked - 1 px - #665650
Selections
Select All
Image - Add Borders - Symmetric
checked - 30 px - #ffffff
Selections - Invert
Fill with the
Gradient 
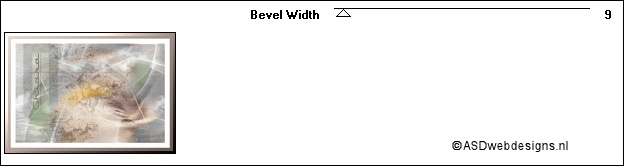
Effects - Plugins - Mock - Bevel
Selections - Invert
Effects - 3D Effects - Drop
Shadow - Vertical 0 -
Horizontal 0 - Opacity 60
- Blur - 30 -
Color - #000000

Selections - Select
None
18
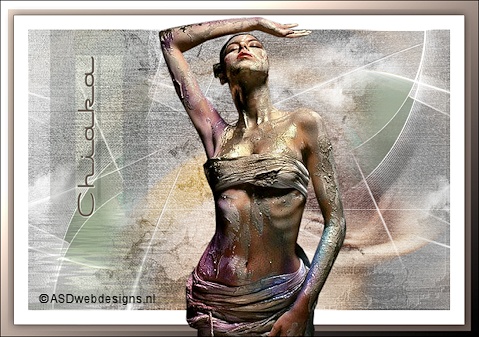
Maximize Tube
"Athe--FM152" from
tray
Edit - Copy
On your work image: Edit - Paste
As New Layer
Move like this:
Effects - 3D Effects - Drop
Shadow - Vertical 0 -
Horizontal 0 - Opacity 60
- Blur - 30 -
Color - #000000
19


